
- 060 319 2282 (MTN) or WhatsApp
- 072 604 4306 (Vodacom) or WhatsApp
- henractech.sales@outlook.com
- sales@henractech.co.za
Menu

Getting Started With Tuya
If this is your first time owning a smart device, we recommend purchasing our Smart Relay Switches. Below is a quick video tutorial and a step-by-step instruction manual on how to install & add any of Tuya’s smart products.
Step 1
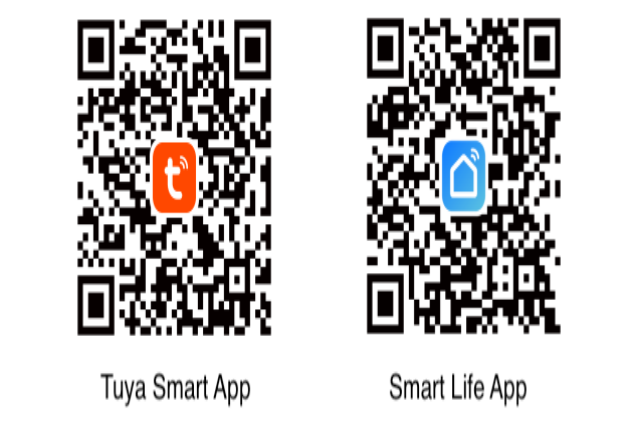
Download the Smart Life/Tuya Smart app from Google Play or Apple App Store or scan the QR code. We recommend downloading both apps & using Smart Life as your main app to connect your smart device & use the Tuya Smart app to test the device before adding it to your main app.
Step 2
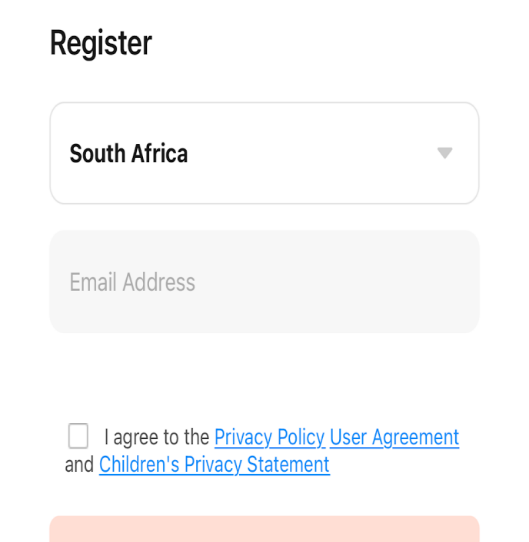
Once you’ve downloaded the app, open up the app & create an account or sign in. When creating an account, enter your email & then a verification code will be sent to you where you will then create a password for your account. To get the verification code, go to your emails, you will see that an email from Smart Life or Tuya Smart has been sent to you. Note: if you did not get any emails from Tuya Smart or Smart Life, go & look at your junk or spam folder.
Step 3
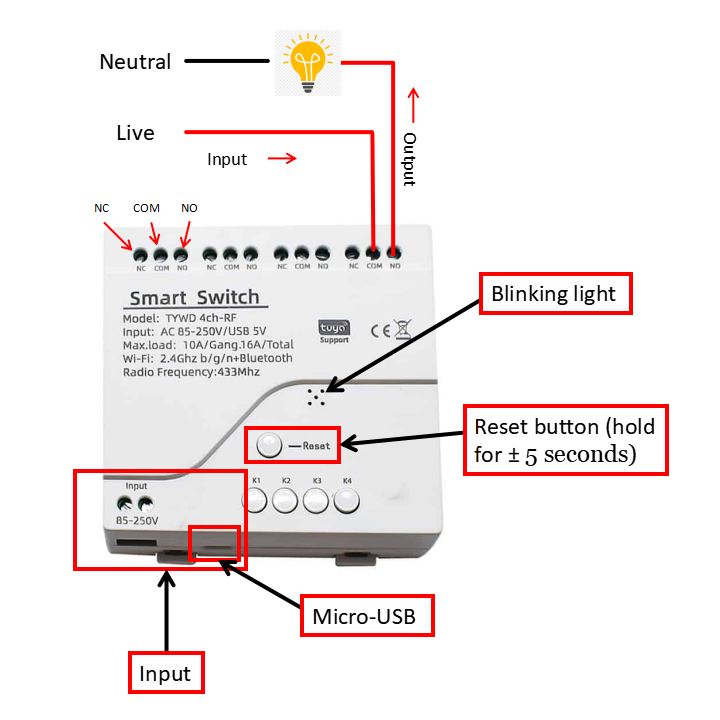
Before you add your smart device to your smartphone, & supply power to it, I will use a Smart WiFi 4-channel Relay Switch for this guide. I will supply 5V to the device, by default you should see a blue/red blinking light. If not, press & hold the reset button for ± 5 seconds. For other Smart devices, please refer to your user manual on how to reset your smart device. I will then connect an LED to NO or normally open & supply 230V to COM.
Note: There are two ways of adding your smart device to your Smart Life or Tuya Smart apps, you can connect the device through Bluetooth, or if your smartphone does not pick up your smart device, you can manually search for it.
Step 4
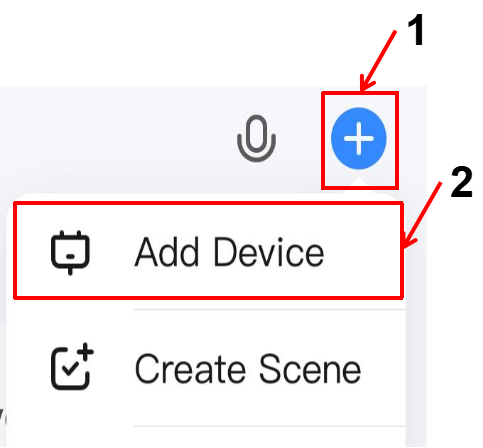
To connect your smart device through Bluetooth. Tap on the ‘+‘ that is in the top right-hand corner. A menu will show, then tap on ‘Add device‘.
Step 5
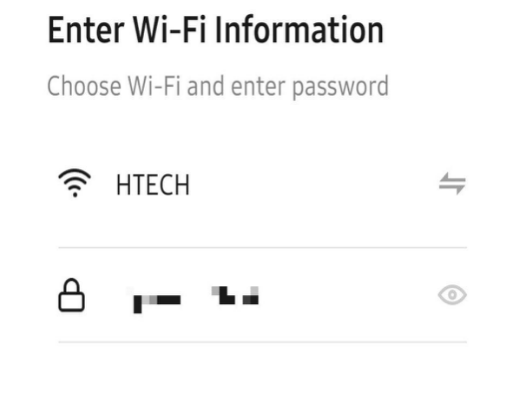
Once you have tapped on the add device, your smartphone should automatically detect your smart device as 4-433. Tap on it, & it will ask you for your WiFi password to which your smartphone is connected. After you have entered your WiFi password, it will start configuring. If you are successful, you can skip steps 6-8.
Step 6
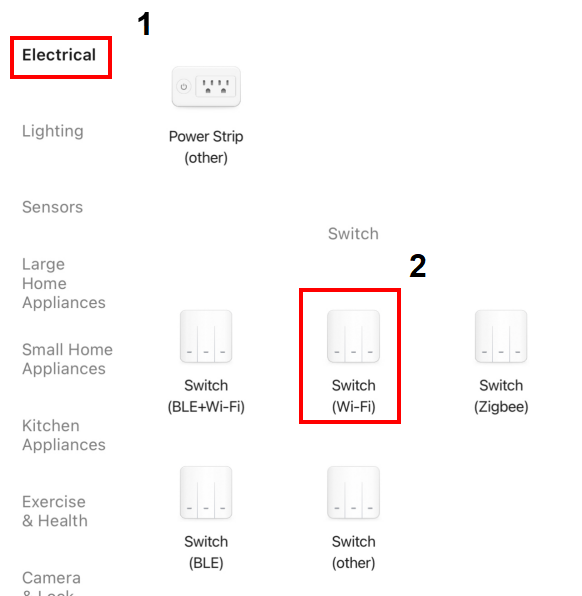
If you are unable to connect to your device by through Bluetooth, scroll down to the electrical section, & go to switches. Tap on Switch (WiFi).
Step 7
The app will ask you for your WiFi password to which your smartphone is connected. After you have entered in your WiFi password.

Step 8
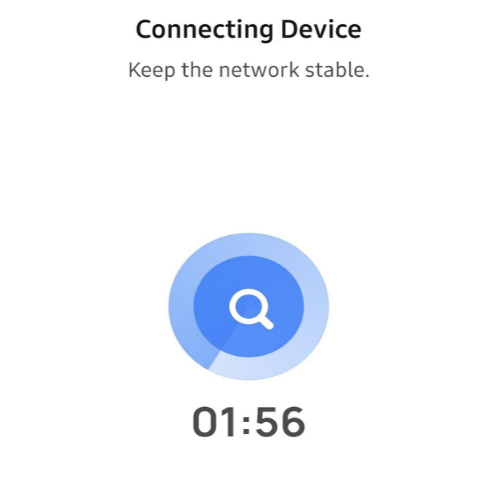
After you have entered your WiFi password, it will take 2 minutes for your smart device to connect to your smartphone.
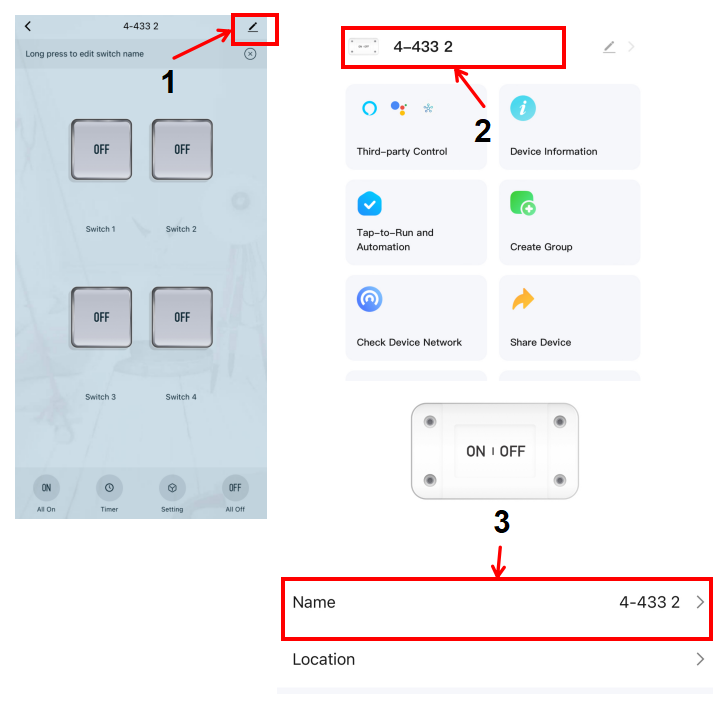
Note: When testing your device, we recommend that you rename your device & switches afterwards.
Step 9
It is time to test your device, go ahead & switch on the LED through your smart device. On your smartphone, you will see one of your switches have been switched on. Go ahead and switch off the LED through your smartphone. If you can switch on & off the LED through both your smart device & smartphone, then your device is working correctly (refer to the video).
Step 10
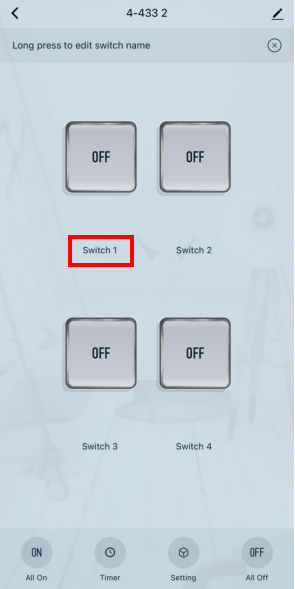
To rename your device’s switches, go into your device, tap and hold the switch’s name (refer to Figure 1). To rename your device, go to the pencil icon in the top right-hand corner. Then tap on 4-433, then tap on the name to rename your device (refer to Figure 2).
Copyright © Henrac Technology (PTY) LTD 2025. All Rights Reserved.
| Cookie | Duration | Description |
|---|---|---|
| cookielawinfo-checkbox-analytics | 11 months | This cookie is set by GDPR Cookie Consent plugin. The cookie is used to store the user consent for the cookies in the category "Analytics". |
| cookielawinfo-checkbox-functional | 11 months | The cookie is set by GDPR cookie consent to record the user consent for the cookies in the category "Functional". |
| cookielawinfo-checkbox-necessary | 11 months | This cookie is set by GDPR Cookie Consent plugin. The cookies is used to store the user consent for the cookies in the category "Necessary". |
| cookielawinfo-checkbox-others | 11 months | This cookie is set by GDPR Cookie Consent plugin. The cookie is used to store the user consent for the cookies in the category "Other. |
| cookielawinfo-checkbox-performance | 11 months | This cookie is set by GDPR Cookie Consent plugin. The cookie is used to store the user consent for the cookies in the category "Performance". |
| viewed_cookie_policy | 11 months | The cookie is set by the GDPR Cookie Consent plugin and is used to store whether or not user has consented to the use of cookies. It does not store any personal data. |